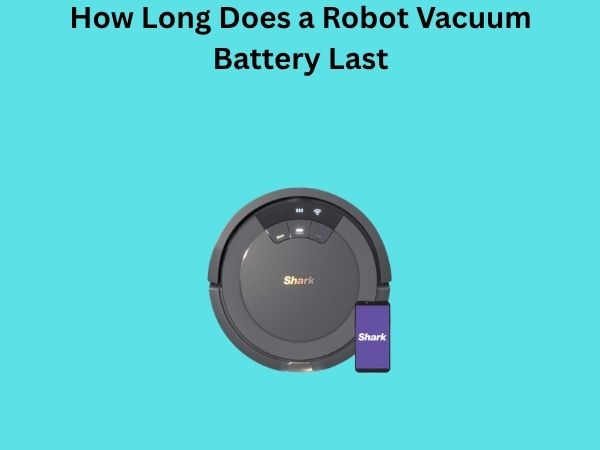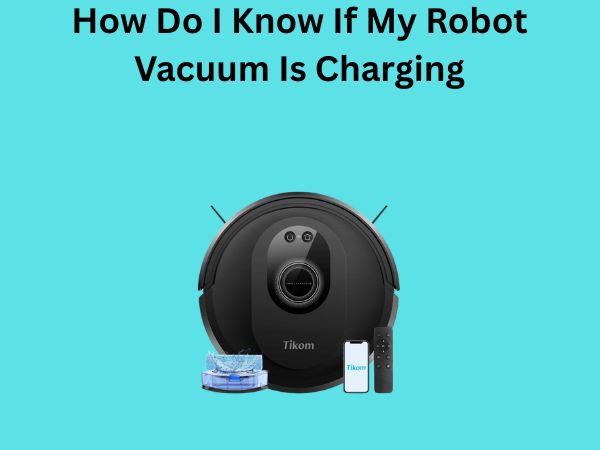
How Do I Know If My Robot Vacuum Is Charging? A Complete Guide
Have you ever walked past your robot vacuum’s charging dock and wondered whether it’s actually charging or just sitting there? You’re not alone. Many robot vacuum owners find themselves puzzled by the charging indicators and signals their machines display. It’s like trying to figure out if your phone is really charging without looking at the screen – you need to know what signs to watch for.
In this comprehensive guide, I’m going to walk you through everything you need to know about determining whether your robot vacuum is charging. Whether you own a popular brand like Roomba, Shark, Eufy, or another model, understanding these signals will help you ensure your device stays properly charged and ready for action.
Understanding Your Robot Vacuum’s Charging System
Before we dive into the specific signs that indicate charging, let’s talk about how robot vacuum charging actually works. Your robot vacuum isn’t so different from a smartphone or laptop – it relies on a rechargeable lithium-ion battery that needs regular charging to function properly. The charging dock serves as a home base where your vacuum returns to top up its battery.
Most modern robot vacuums are designed with automatic charging features. This means they can navigate back to their dock when the battery runs low, which is pretty convenient. However, just because your vacuum is near the dock doesn’t automatically mean it’s charging. There’s a connection that needs to happen, and if that connection isn’t made properly, your vacuum might just sit there without actually recharging.
The Primary Indicator: Your Robot Vacuum’s LED Lights
The most obvious way to know if your robot vacuum is charging is by observing the LED lights on your device. Think of these lights as your vacuum’s way of communicating with you. Different colored lights and patterns typically indicate different charging states.
What the Different Light Colors Mean
Most robot vacuums use a color-coded light system to communicate their charging status. Here’s what you should typically look for:
- Solid blue or green light: This usually indicates that your vacuum is actively charging. The steady glow means everything is working as it should be, and your device is drawing power from the dock.
- Blinking or pulsing lights: A light that blinks or pulses typically means your vacuum is in the process of connecting to the dock or initializing the charging process. It’s like a handshake between the vacuum and the dock.
- Red or amber light: This often signals a problem. It might mean the vacuum isn’t properly connected, there’s an obstacle preventing charging, or there’s an error with the battery itself.
- No light at all: If there’s no light and your vacuum should be charging, something has definitely gone wrong.
Where to Look for These Lights
The LED indicators on your robot vacuum are usually located on the top of the device, though some models place them on the front or side. You might see a single light or multiple lights depending on your model. Always consult your user manual for the exact location, as different manufacturers design their devices differently.
Checking Your Robot Vacuum’s Display or App
Modern robot vacuums often come equipped with smartphone apps that provide real-time status updates. This is one of the most reliable ways to confirm charging status because the app communicates directly with your device.
Using Your Robot Vacuum’s Mobile Application
If your vacuum is app-enabled, simply open the application and look for the battery status section. Most apps display the current battery percentage and charging status clearly. You might see indicators like “Charging,” “Fully Charged,” or “Not Charging” depending on the app’s design. Some apps even send you notifications when your vacuum finishes charging, which is incredibly convenient.
What If Your Vacuum Doesn’t Have an App?
Not all robot vacuums come with app compatibility, especially older models or budget-friendly options. If yours doesn’t have an app, don’t worry – the physical indicators we discussed earlier will be your main tool for determining charging status.
Physical Connection: The Charging Contacts
Understanding the physical connection between your vacuum and its dock is crucial. Your robot vacuum has charging contacts – usually metallic points or plates – that must make proper contact with the corresponding contacts on the dock.
How the Connection Works
Think of this like plugging in a traditional charger. The contacts on your vacuum need to align perfectly with the contacts on the dock. When they connect properly, an electrical circuit completes, and charging begins. If the alignment is off even slightly, no charging will occur, even though your vacuum appears to be “docked.”
Signs Your Contacts Aren’t Making Proper Connection
- Your vacuum returns to the dock but the LED doesn’t light up
- The app shows “not charging” even though the vacuum is at the dock
- The vacuum randomly leaves the dock without fully charging
- You see dirty or corroded contacts on either the vacuum or the dock
Auditory Clues: Sounds Your Vacuum Makes While Charging
Sometimes your ears can tell you what your eyes might miss. Your robot vacuum often produces sounds when it’s charging, especially during the initial docking process.
What Sounds Indicate Successful Charging
When your vacuum first connects to the dock, you might hear a small beep or click sound. This is the vacuum’s way of confirming that it has successfully docked and is making proper contact. Once charging begins, you usually won’t hear much – perhaps a very faint hum if you listen closely. This quiet operation is normal and indicates everything is working properly.
Unusual Sounds That Signal Problems
If your vacuum makes loud grinding, squealing, or continuous clicking sounds near the dock, something might be wrong. These unusual noises could indicate contact problems, alignment issues, or even a malfunction with the charging circuitry. In these cases, you should stop the charging attempt and investigate.
Checking the Charging Dock Itself
Don’t overlook the dock when troubleshooting charging issues. The dock is just as important as the vacuum itself in this equation.
Signs Your Dock Is Working Properly
A functioning dock typically shows its own indicators. Many docks have LED lights that show power status. If your dock is plugged in and functional, you should see at least one light lit up on the dock itself. The dock usually remains lit even when the vacuum isn’t docked, showing that it has power and is ready to charge.
Troubleshooting Dock Issues
If your dock isn’t showing any signs of power, check whether it’s properly plugged in. Try a different outlet to rule out electrical problems. Some docks have reset buttons – if yours does, try pressing it. Make sure there are no loose connections or damaged cables. These simple checks often reveal the source of charging problems.
How Long Should Charging Take?
Knowing how long your vacuum should take to charge can help you identify problems early. If it’s taking twice as long as usual, something might be amiss.
Typical Charging Times
Most robot vacuums take between two to four hours to fully charge from completely empty. High-capacity models might take up to five hours, while smaller or budget models might charge in just ninety minutes. Check your user manual for the specific charging time of your model – this information is invaluable for troubleshooting.
Fast Charging Versus Standard Charging
Some newer robot vacuums offer fast-charging capabilities. If your model supports this feature, it might charge significantly faster than traditional models. If you’re unsure whether your vacuum has this feature, consult your manual or the manufacturer’s website.
Battery Health and Charging Efficiency
Over time, your robot vacuum’s battery will age, which can affect how it charges and performs. Understanding battery health helps you recognize normal aging versus actual charging problems.
Signs of Battery Degradation
An aging battery might take longer to charge than it did when the vacuum was new. You might also notice that the vacuum doesn’t run as long on a full charge as it used to. This is completely normal – batteries naturally lose capacity over time, just like the battery in your car or smartphone.
When to Consider Battery Replacement
If your robot vacuum is several years old and you’re noticing significant charging time increases or drastically reduced runtime, the battery might need replacement. Most manufacturers sell replacement batteries, though this is an investment worth considering before purchasing a new vacuum.
Environmental Factors That Affect Charging
Your home environment can impact how well your robot vacuum charges. These aren’t problems with your vacuum – they’re just factors you should be aware of.
Temperature and Charging
Robot vacuums charge best in moderate temperatures. Extreme heat or cold can slow down the charging process. If your vacuum is in a cold garage or a hot storage room, try moving it to a room-temperature location for charging. Most lithium-ion batteries perform optimally between 50 and 85 degrees Fahrenheit.
Humidity and Moisture
Moisture can damage charging contacts and circuitry. Make sure your charging dock is in a relatively dry location and that your vacuum is dry before docking it. If your vacuum has been exposed to water, allow it to dry completely before attempting to charge.
Common Charging Problems and Solutions
Let’s address some situations you might encounter and how to resolve them.
Problem: Vacuum Won’t Stay on the Dock
If your vacuum keeps leaving the dock without fully charging, the dock might be misaligned or the contacts might be dirty. Try cleaning the contacts with a soft, dry cloth and ensuring the dock is perfectly level and positioned correctly according to your manual’s instructions.
Problem: Slow Charging
Slow charging can result from dirty contacts, damaged cables, or battery issues. Start by cleaning the contacts on both the vacuum and dock. If charging remains slow, the battery might be degrading and could need replacement.
Problem: App Shows Charging, But Vacuum Seems Dead
This is frustrating, but it might mean the app is displaying incorrect information or there’s a disconnection between the app and the device. Try restarting the app, restarting your vacuum by holding down the power button, or moving the vacuum away from the dock and returning it manually.
Best Practices for Maintaining Optimal Charging
To keep your robot vacuum charging properly, follow these guidelines.
Regular Maintenance Tasks
- Clean the charging contacts monthly: Use a soft, dry cloth to wipe both the vacuum’s contacts and the dock’s contacts. Buildup from dust and debris prevents proper connection.
- Keep the dock in an open space: Make sure the dock has adequate space around it and isn’t blocked by furniture or other obstacles.
- Check for cable damage: Regularly inspect the dock’s power cable for any cuts, fraying, or damage.
- Allow proper ventilation: Ensure the dock and vacuum have adequate airflow while charging to prevent overheating.
Charging Schedule Tips
Modern robot vacuums are designed to handle regular charging without damage. You don’t need to worry about overcharging like you might with older devices. Most vacuums automatically stop charging once the battery reaches full capacity. Feel free to keep your vacuum docked when not in use – it’s actually the ideal way to store it.
When to Contact Customer Support
Sometimes despite your best efforts, charging issues persist. You might need professional help if you’ve tried all the troubleshooting steps and nothing works.
Signs You Should Reach Out to Support
- Charging indicators are completely unresponsive
- The dock shows no signs of power even when plugged in
- You see visible damage to charging contacts or cables
- The problem started suddenly without any obvious cause
- You’ve tried all troubleshooting steps multiple times without success
Contact your vacuum’s manufacturer through their website or customer service number. Most reputable companies offer warranties that cover charging system failures, and they can provide replacement parts or service options.
Conclusion
Knowing whether your robot vacuum is charging is straightforward once you understand the signals to watch for. By paying attention to LED indicators, checking your app, ensuring proper physical connection, and listening for audio cues, you can easily determine your vacuum’s charging status. Remember that maintaining clean contacts, keeping the dock properly positioned, and monitoring charging times will help prevent most charging-related issues before they start. Your robot vacuum is an investment in your home’s cleanliness, and proper charging ensures it remains ready to do its job whenever you need it. With the knowledge you’ve gained from this guide, you’re well-equipped to troubleshoot any charging concerns and keep your robotic helper running smoothly for years to come.
Frequently Asked Questions
Can I leave my robot vacuum on the dock all the time?
Yes, absolutely. Modern robot vacuums are designed to remain docked when not in use. The charging systems are intelligent enough to prevent overcharging, so your battery won’t be damaged by leaving the vacuum constantly on the dock. In fact, this is recommended because it ensures your vacuum is always charged and ready to clean whenever you schedule it to run.
Why does my robot vacuum dock but not charge?
This is typically caused by misaligned or dirty charging contacts. Start by gently cleaning both the contacts on your vacuum and the contacts on the dock using a soft, dry cloth. If that doesn’t help, ensure the dock is perfectly level and positioned according to your manual’s instructions. If problems persist, there might be an issue with the dock’s power supply or the vacuum’s charging circuit, which would require contacting customer support.
How can I tell if my robot vacuum battery is dying?
Several signs indicate battery degradation. If your vacuum now takes significantly longer to charge than it did when new, or if it runs for much shorter periods on a full charge, the battery might be aging. Additionally, if your vacuum seems unable to reach full charge or repeatedly shows low battery warnings, these could all indicate that battery replacement is needed. Check your manufacturer’s website for replacement battery options.
What should I do if my robot vacuum’s dock has no power?
First, verify that the dock is plugged into a functioning outlet by testing the outlet with another device like a lamp. Try plugging the dock into a different outlet to rule out electrical problems with that specific outlet. Check all cable connections to ensure they’re secure. If the dock still shows no power, look for a reset button on the dock and try pressing it. If none of these steps work, the dock’s power adapter might be defective and may need replacement.
Is it normal for my robot vacuum to make noise while charging?
A single beep or click when your vacuum first docks is completely normal and indicates successful connection. However, once charging begins, your vacuum should operate quietly. If you hear continuous loud noises, grinding sounds, or unusual grinding while charging, something might be wrong with the charging mechanism or the vacuum’s internal systems. In this case, try undocking the vacuum and redocking it. If the noises continue, consult your user manual or contact customer support.
“`